Models:
| Product Specifications | 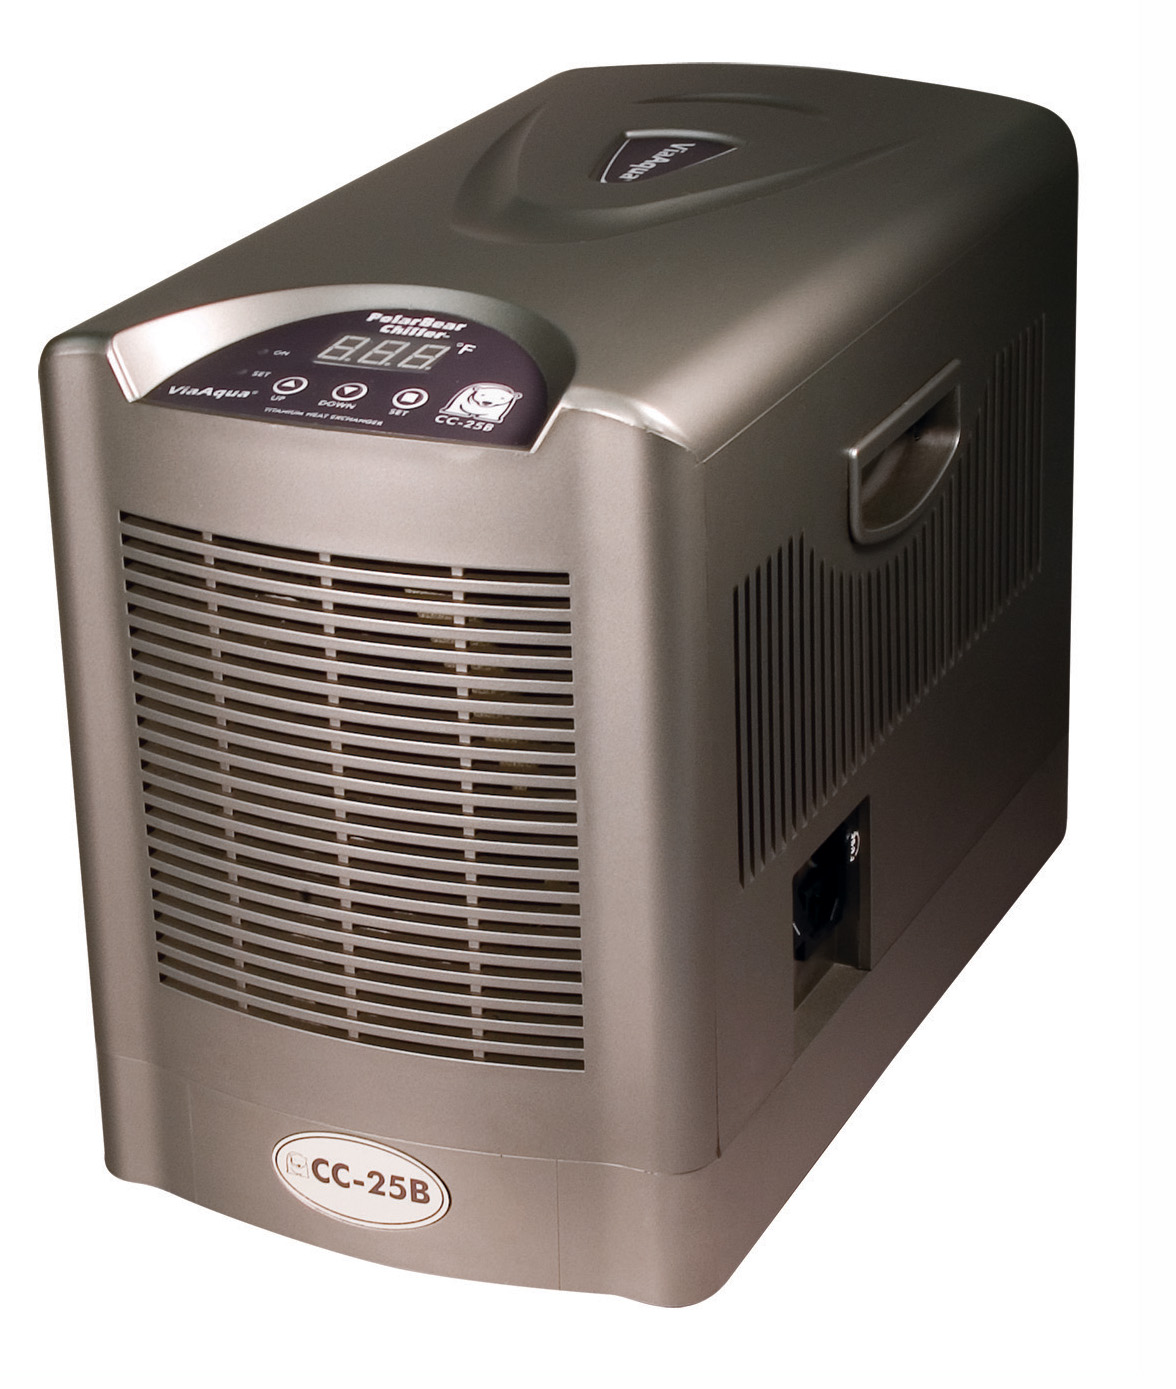 |
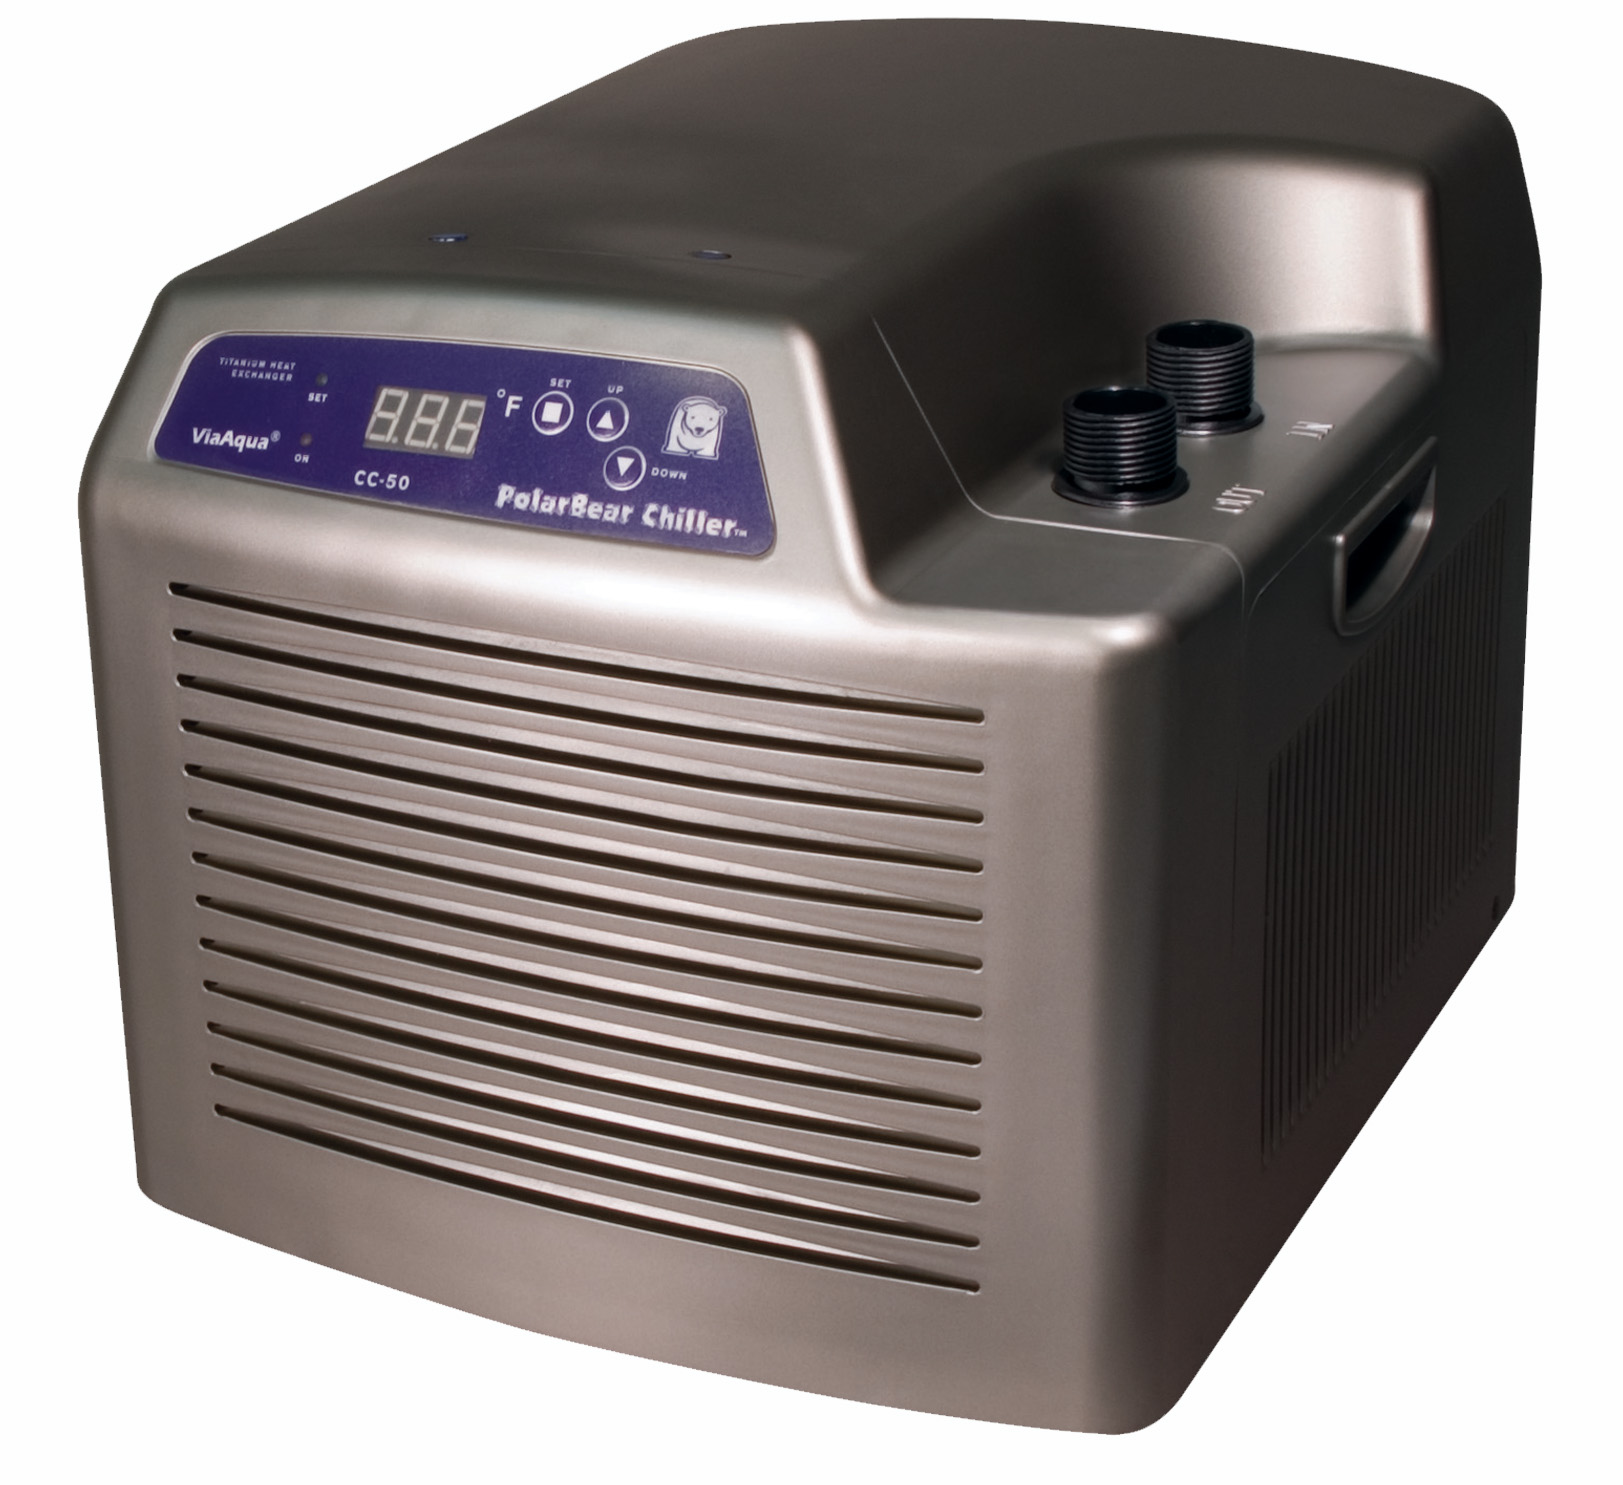 |
| Model | CC-25B | CC-50 |
| Voltage | 120 v | 120 v |
| rated capacity | 450 watt | 850 watt |
| Current | 2 amp | 3.5 amp |
| Refrigerant | R 134a | R 134a |
| Refrigerant Weight | 120 g | 220 g |
| Min. – Max. water flow | 100 GPH – 400 GPH | 100 GPH – 400 GPH |
| Inlet and outlet | 5/8 – 3/4 in. | 5/8 – 3/4 in. |
| Aquarium Size | up to 75 gallon tank | up to 125 gallon tank |
| Unit Dimensions | 14.2 x 8.2 x 10.5 in. | 16 x 13.2 x 12 in. |
| UPC #0069037 | 2770 9 | 1366 5 |
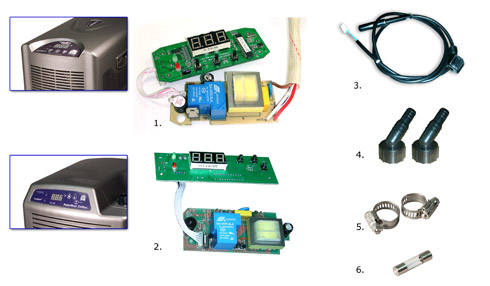
Parts:
Replacement Parts
|
|---|
 |
Installation:
Required Tools (not included): Hose clamps and water source.
- Place the chiller in a well ventilated level surface.
- Attach the barbed compression fitting to the chiller intake and output.
Attach flexible tubing to the intake barb on the chiller using a hose clamp to ensure tightness. - Connect to water supply or water pump to the unit. Water flow should be a min. of 100 GPH and not to exceed 400 GPH. It is recommended to pre-filter the water first.
Attach a piece of flexible tubing to the output barb of the chiller using a hose clamp.
Verify that the water returning from the chiller is not in close proximity to the intake water source. - Secure the return line.
- Verify that there are not any kinks in the tubing supplying water to the chiller or in the output tube returning water to the aquarium or sump.
- Turn on water pump or water supply.
- Check all connections to verify that there are not any leaks.
SETTING THE THERMOSTAT:
- Plug the chiller into a G.F.C.I. outlet.
- Switch the unit ON.
- The LED screen now will read the temperature of the current aquarium water.
Press the SET button. The LED screen will now flash and the green led light will be lit.
Adjust the temperature using the UP/DOWN buttons. Once the LED screen reads the correct temperature, Press the SET button again. The green LED light will then go out. - There is a 2-3 minute delay prior to the chiller turning on. When the chiller is ON, the green LED light will be lit.
Note:
- If installing on a preexisting aquarium, lower the temperature by 1-2 degrees per day.
- If the unit is turned off, it will take a minimum of 3 min. to come back on. It will take up to 5 min. for the computer/thermostat to adjust to the aquarium temperature and the set temperature prior to turning on.
|
download
|
Polar Bear Chiller Instructions. Chiller Instructions. |
If you have problem opening PDF file from Internet Explorer,
please try Firefox or right click on the link and select Save Target As and save the PDF file in your computer.
Maintenance:
- It is recommended to clean the radiator once a month. To do this, gently vacuum the radiator to remove all dust and debris.
- Do not hose down or use water to clean the radiator or other external components.
Once a month, flush the internal heat exchanger with clean fresh water. Do not use any soap or detergents. - Do not submerge in water. The chiller must be completely free of all moisture.
- Once a month, clean the pre-filter of the pump supplying water to the chiller.
Note: If you have any questions or concerns about working on the chiller, always consult a certified electrician first.
“EL” or “EH” is displayed
In general, the primary reason for “EL” or “EH” to be displayed is when the temperature sensor has malfunctioned. Please refers the instruction below for proper directions.
| REPLACEMENT OF TEMPERATURE SENSOR |
| Important: Always consult a certified electrician first if you have any questions or concerns about working on the chiller. Required tools: wire cutters and Phillips screw driver. |
| FOR MODEL CC-25B |
|
|
FOR MODEL CC-50 |
|
Replacment of Temperature sensor:
Models:
| Item No. | Dimension | Aquarium Size | Wattage | UPC No. |
| VA 50TH | 1 x 1 x 8 in | 50 Liters / 13 Gallons | 50 watt | 006903733342 |
| VA 100TH | 1 x 1 x 8 in | 100 Liters / 25 Gallons | 100 watt | 006903733359 |
| VA 200TH | 1 x 1 x 10 in | 200 Liters / 50 Gallons | 200 watt | 006903733366 |
| VA 300TH | 1 x 1 x 11.5 in | 300 Liters / 80 Gallons | 300 watt | 006903733373 |
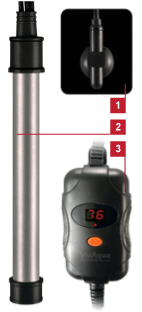
Part List:
|
 |
|---|
Installation:
 |
||||
|---|---|---|---|---|
If you have problem opening PDF file from Internet Explorer, |
Precaution:
PRECAUTION AND SAFEGUARD
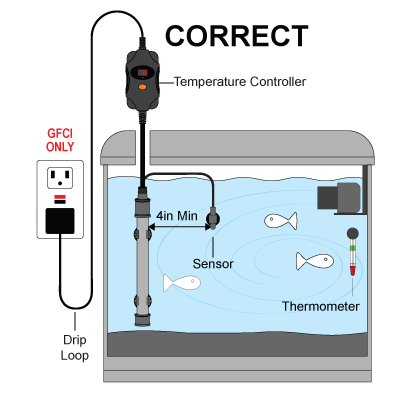
Before installation of the ViaAqua® Titanium Heater, read and follow these important warning and safeguards.
- Always disconnect the heater from the power supply prior to maintenance of the aquarium.
- When removing the heater from the aquarium the heater must be unplugged for 30 minutes prior to removal.
- Heater and the sensor must be submersed in the same body of water
- Plug only into a GFCI (Ground Fault Circuit Interrupter). The national code requires that a GFCI be used in the branch circuit supplying power to all water pumps and electrical aquarium equipment.
- Do not plug into an extension cord/power strip.
- Do not operate the heater if any of the cords are damaged.
- Do not operate the heater out of water.
- The temperature controller must not come in contact with water and/or moisture.
- For indoor household use only.
This product may contain chemicals known to the state of California to cause cancer and or birth defects or other reproductive harm. Wash your hand after handling this product.
It is your sole responsibilities to verify that the plug and the receptacle are clean and free of moisture and salt build up at all times. The receptacle must be free of water, salt, calcium, magnesium and dust. Failure to do so can cause fire, damage to property, permanent damage to the product and personal injury not limited to loss of life.
Do not plug into extension cord/power strip.
A drip loop must be used when plugging all electrical aquarium devices. A drip loop is that part of the cord hanging below the receptacle.
The national code requires that a GFCI (Ground fault circuit interrupter) be used in the branch circuit supplying all power to water pumps and electrical aquarium equipment. If you do not have a GFCI, have an electrician install one prior to operating any aquarium component.
Additional Safety Precautions & Warnings: Age Recommendation: 18 years or over. Not a toy. Not intended for use by children without direct adult supervision. As the user of this product, you are solely responsible for operating it in a manner that does not endanger yourself and others or result in damage to the product or the property of others.
FOR HOUSEHOLD USE ONLY.
Models:
| Item No. | Dimension | Aquarium Size | Wattage | UPC No. |
| VA-50Q | 1.1 x 1.1 x 8.2 in | 50 Liters / 13 Gallons | 50 watt | 006903733281 |
| VA-100Q | 1.1 x 1.1 x 10.7 in | 100 Liters / 25 Gallons | 100 watt | 006903733298 |
| VA-200Q | 1.1 x 1.1 x 12.5 in | 200 Liters / 50 Gallons | 200 watt | 006903733304 |
| VA-300Q | 1.1 x 1.1 x 14.8 in | 300 Liters / 80 Gallons | 300 watt | 006903733311 |
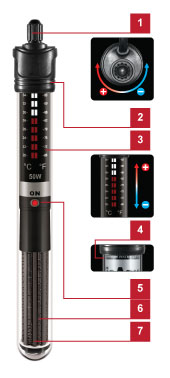
Part List:
|
1. Temperature Adjustment |
 |
|---|
Installation:
 |
||||
|---|---|---|---|---|
If you have problem opening PDF file from Internet Explorer, |
Precaution:PRECAUTION AND SAFEGUARD
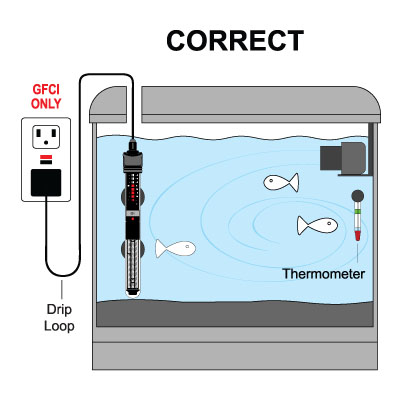
Before installation of the ViaAqua® Quartz Heater, read and follow these important warning and safeguards.
- Always disconnect the heater from the power supply prior to maintenance of the aquarium.
- When removing the heater from the aquarium the heater must be unplugged for 30 minutes prior to removal.
- Heater must be installed below the minimum water level line located on heater
- Plug only into a GFCI (Ground Fault Circuit Interrupter). The national code requires that a GFCI be used in the branch circuit supplying power to all water pumps and electrical aquarium equipment.
- Do not plug into an extension cord/power strip.
- Do not operate the heater if any of the cords are damaged.
- Do not operate the heater out of water.
This product may contain chemicals known to the state of California to cause cancer and or birth defects or other reproductive harm. Wash your hand after handling this product.
It is your sole responsibilities to verify that the plug and the receptacle are clean and free of moisture and salt build up at all times. The receptacle must be free of water, salt, calcium, magnesium and dust. Failure to do so can cause fire, damage to property, permanent damage to the product and personal injury not limited to loss of life.
Do not plug into extension cord/power strip.
A drip loop must be used when plugging all electrical aquarium devices. A drip loop is that part of the cord hanging below the receptacle.
The national code requires that a GFCI (Ground fault circuit interrupter) be used in the branch circuit supplying all power to water pumps and electrical aquarium equipment. If you do not have a GFCI, have an electrician install one prior to operating any aquarium component.
Additional Safety Precautions & Warnings: Age Recommendation: 18 years or over. Not a toy. Not intended for use by children without direct adult supervision. As the user of this product, you are solely responsible for operating it in a manner that does not endanger yourself and others or result in damage to the product or the property of others.
FOR HOUSEHOLD USE ONLY