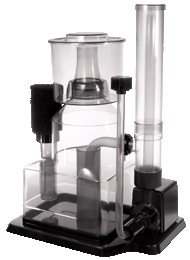
-
Specifications:
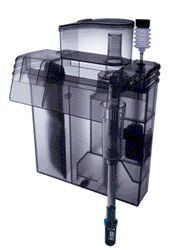
MULTI-SKIMMER II™ DELUXE - Built-in UV Sterilizer chamber
- Includes 5 watt compact UV Sterilizer bulb
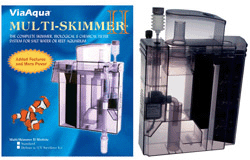
The UV Sterilizer is a 5 watt compact PL UV bulb surrounded by a quartz sleeve for increased efficiently and is enclosed in a replaceable high-density UV resistant plastic that drops directly into the UV-Bio Chamber of the Multi-Skimmer. UV light eliminates single cell floating algae and destroys most harmful microorganism providing a clear healthy aquarium. -
Models:
-
Parts:
- Primer and Silencer
- Variable venturi cover
- Variable venturi lock nut
- Variable venturi
- Main body
- Motor and impeller
- Pump cover
- Surface skimmer
- Intake tube and strainer
- Level Screw
- Leveling and secure screw
- Filter cartridge
- UV Sterilizer reaction chamber
- Filter cartridge cover
- Collection cup
- Water level control
- Ballast
- PL Socket
- Quartz sleeve
- PL UV bulb (5 watt)
-
Installation:
- Screw set to the center of the skimmer.
- Place the skimmer on the back of the aquarium.
- Tighten the set screw to secure the skimmer onto the back of the aquarium.
- Assemble the surface skimmer and intake strainer.
- The surface skimmer needs to be adjusted so that the water level is at the middle of the slots.
- Remove filter cartridge.
- Place water in the skimmer.
- Verify that the flow control is all the way open.
- Place the priming silencer onto the top of the variable venturi intake tube. The priming silencer needs to be threaded onto the top of the variable venturi intake tube. Now rotate the cap so that the hole on the top of the silencer is turned away from the green dot.
Option 2 for priming: Attach a 3-4 foot piece of airline tubing to the variable venturi tube and apply suction until the air is removed from the intake tube. - Plug pump into a GFCI electrical outlet.
- Now squeeze the priming silencer until all the air is removed from the intake tube.
- The motor will engage and start to pump water.
- Once water is discharging back into the aquarium open the air to the variable venturi tube by twisting the top of the priming silencer and aligning it with the green dot.
- Remove filter cartridge and place in skimmer
- Verify that there are not any leaks
-
Maintenance:
Replacement of the UV Bulb (UV model only)
The PL UV bulb needs to be replaced every 8,000-9,000 hours for optimum performance.- Unplug all aquarium devices prior to working on the Multi-skimmer and/or aquarium.
- Remove the black reaction chamber from the main body of the skimmer
- Slide the out the top of the reaction chamber
- Remove the quartz sleeve
- Unscrew the top of the quartz sleeve
- Clean quartz sleeve
- Replace the PL ultraviolet bulb. Try not to have your hands come in direct contact with the bulb use a clean cloth to handle the bulb and install the bulb
- To insure a good seal add a small amount of silicone lubricant to the O-ring
- Hand tighten and reinstall.
Filter Cartridges (every 3 – 4 weeks)
- Remove the filter cartridge and replace.
- Clean with aquarium water and place back into the filter. Do not clean with tap water as this will kill beneficial bacteria.
ReplacementReplacement filter cartridges. Replacement UV bulb.
Vestibulum curae torquent diam diam commodo parturient penatibus nunc dui adipiscing convallis bulum parturient suspendisse parturient a.Parturient in parturient scelerisque nibh lectus quam a natoque adipiscing a vestibulum hendrerit et pharetra fames nunc natoque dui.

